After you complete the onboarding tour and are familiar with Roblox Studio's user interface, you're ready to start creating experiences on the platform.
Using a sample high-quality catapult asset pack, this tutorial walks you through the creation process for an experience in which players can launch five projectiles toward targets on floating platforms before a UI displays that allows them to reset the environment, including guidance on:
- Building and organizing a data model for a single place using one of Studio's project templates.
- Customizing both primitive and complex 3D objects from the Creator Store with unique properties for your own gameplay requirements.
- Organizing and placing scripts in their proper locations so the Roblox engine can properly simulate and render gameplay.
- Playtesting and publishing your creation to a global audience that accesses the platform using a variety of devices.
After you complete this process, you can learn how to recreate a simple 3D platformer experience with the core curriculum, experiment with different use case tutorials, or start making your own projects.

Create a Project
A project is a collection of assets, settings, and other resources that together represent an experience. All projects start with a single place that players load into when they join an experience, but you can create additional places within that same experience to organize assets for different gameplay areas. For example, if you want players to join a dungeon before teleporting to either a vast desert or spooky island, you can organize the assets for each area into their own place.

A place's object hierarchy is its data model, and it describes everything that compiles that gameplay area, such as the objects that make up the 3D world to objects that control runtime behavior. When you first open a project, the starting place's data model is relatively simple, but it can quickly become more complex depending on the amount of objects, interactivity, or behavior you want to implement in your experience.


For your first experience, this tutorial teaches you how to build and organize a data model for a single place using one of Studio's project templates. Project templates are useful because they provide a set of default objects in the starting place's data model that you can use to build experiences for different genres.
For example, if you want to build a roleplay experience with a sprawling city, you can open the Modern City template that includes reusable wall, window, and door objects you can snap together to create unique building variations. Similarly, if you want to build a racing experience, you can open the Racing template that includes a working race car and winding track object you can restructure in countless configurations.


To keep things simple, this tutorial instructs you to create a project with the Baseplate template because it includes two default objects that are important for almost every experience on the platform:
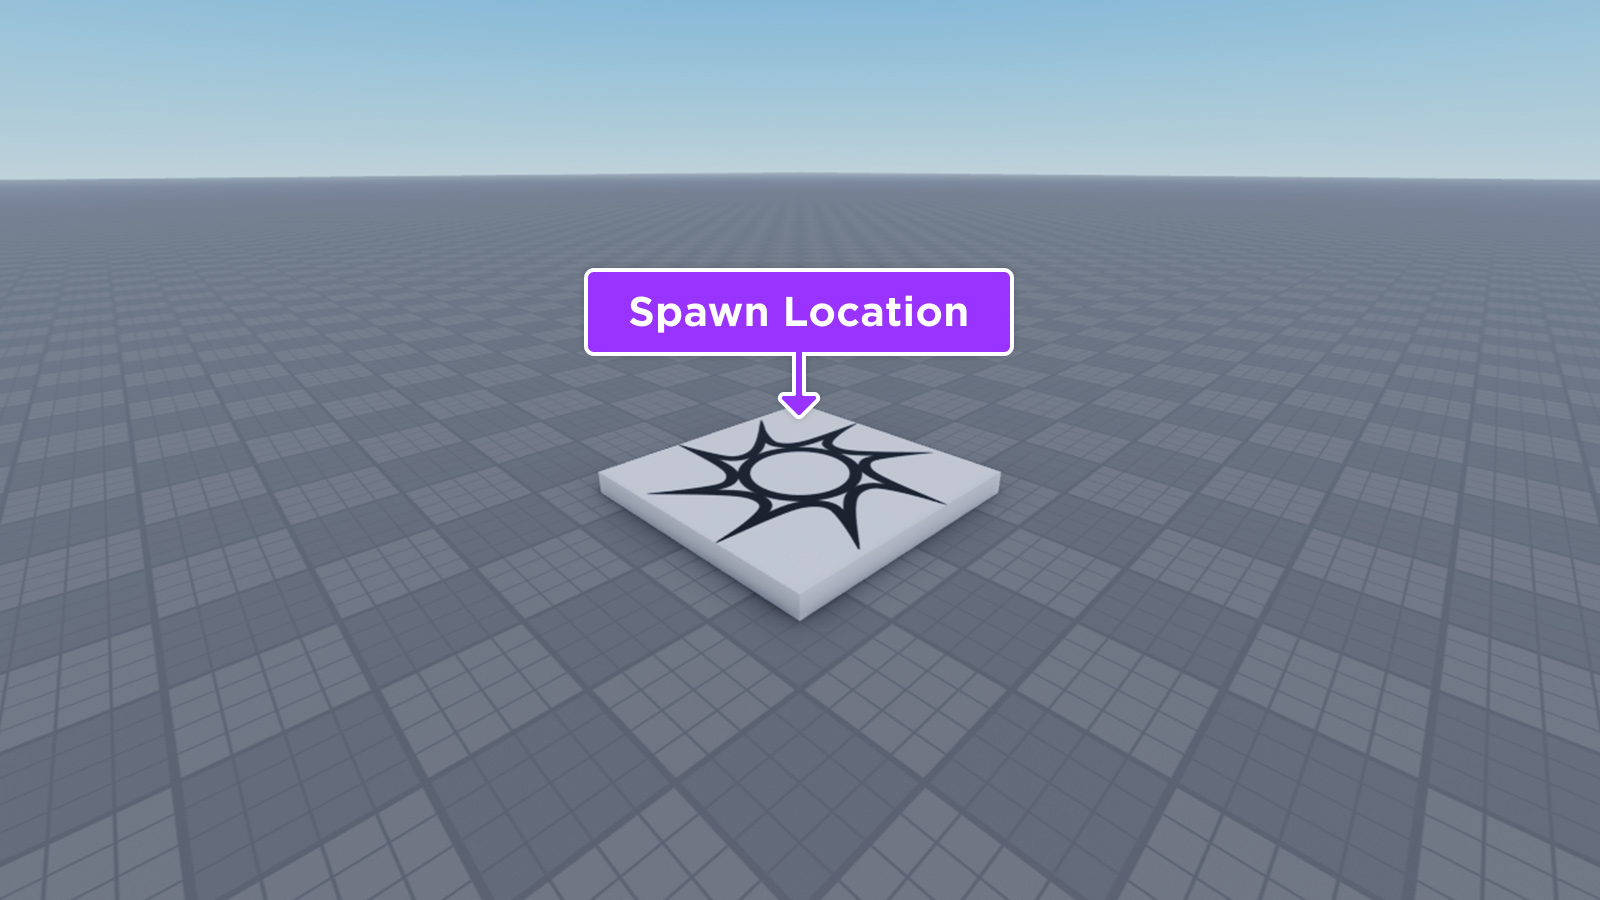
- Spawn location – A SpawnLocation object is where player characters appear in the 3D space when they join an experience, as well as where they respawn when their health reaches zero.
- Baseplate – A baseplate is a floor with a 4x4 grid texture.
This template is a great starting point to create your first experience because it provides a neutral world with high-fidelity lighting technology, and a floor that aligns with stud measurements that you can use to position and orient 3D objects along a grid. Studs are Studio's base unit of length, and each stud equates to about 28 cm. For more information on Studio's primary units, see Roblox Units.

To open a project with the Baseplate template:
Open Roblox Studio. The landing page displays all available project templates.
Select the Baseplate template tile. Studio opens a new experience with a spawn location and a baseplate.

Get Asset Pack
Now that you have a project open, you can add additional 3D objects to the data model aside from the spawn location and baseplate. Studio represents 3D objects as BasePart objects that render with physical simulation in the 3D space, and emulate real-world physical behavior like gravity, friction, and force.
There are several types of BasePart objects, but the most common are:
- Parts – A Part object is Studio's primitive 3D object that comes in five different shapes: ball, block, cylinder, wedge, and corner wedge.
- Meshes – A MeshPart object is a collection of vertices, edges, and faces that make up an object from a third-party modeling application.
To help you become familiar with both types of 3D objects, this tutorial provides you an asset pack that includes the following parts and meshes that create the core gameplay for your first experience:


You can find this asset pack on the Creator Store, a marketplace that features assets from Roblox and the Roblox community for use within your projects, including model, image, mesh, audio, plugin, video, and font assets. The Creator Store is accessible directly in Studio within the Toolbox, as well as on the Creator Hub. For more information about this marketplace, see Creator Store.

To insert this tutorial's asset pack from the Creator Store to your Studio inventory, click the Add to Inventory link in the following component. Once assets are within your inventory, you can reuse them in any project on the platform.
To get this asset pack from your inventory into your experience:
In the menu bar, select the View tab.
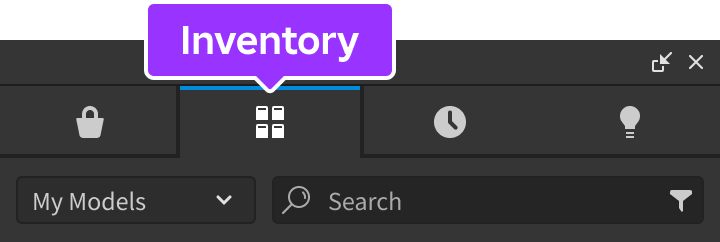
In the Show section, click Toolbox. The Toolbox window displays.

In the Toolbox window, click the Inventory tab. The My Models sort displays.
Click the Intro to Studio - Catapult & Platforms tile. The asset pack displays in your viewport.


Customize Targets
When you add a 3D object into your experience, Studio updates the Explorer window to display the name of the object and a nest of its children within the Workspace service. For example, after you add the catapult model into your viewport, the Explorer window displays the IntrotoStudioCatapult folder and its child assets alongside the spawn location and baseplate.

The Explorer window is a fundamental Studio window that represents the data model for the place in your experience that you have open. This means that if you have an experience with multiple places, this window displays different objects depending on the place you're currently working on.
When you select an object in the Explorer window, Studio updates the Properties window to display a selection of properties you can customize for that object without using a script, such as the object's size, color, position, or orientation. To demonstrate this process, this section of the tutorial provides guidance on customizing the visual and behavioral characteristics of the gray targets on the floating platforms.
To customize your targets:
Select one of the target objects.
In the Explorer window, click the dropdown arrow to the left of the IntroToStudioCatapult folder to display all of its children.
Using this process, expand the TargetPlatforms folder, the child TargetPlatform model for the floating platform closest to the grounded catapult platform, and its TargetParts folder to display every part on the floating platform.

Click one of the parts. The viewport displays an outline around the object to indicate that it is selected, and the Properties window updates to display a selection of customizable properties for that specific part.

In the Properties window,
- Set BrickColor to the color you want to tint the part.
- Set Size to the scale you want the part to have along the X, Y, and Z axes.
- Set CFrame.Position to the location you want the part to have on the platform.
- Set CFrame.Orientation to the rotation you want the part to have along the Y axis.

Repeat this process for other parts on the floating platforms.


Organize Scripts
While you have a lot of flexibility in how you organize data models within your projects, the Roblox engine expects certain objects to be in specific container services for simulation and rendering functionality to work properly between the server and the client. The server refers to a Roblox computer that acts as the ultimate authority for maintaining the experience's state, and it keeps all connected clients, or player devices like mobile phones and laptops, in sync with its source of truth.

The main categories of container services include:
- Workspace - Contains objects that render in the 3D world.
- Environment - Contains objects for environmental settings and elements.
- Replication - Contains content and logic that replicates between the server and client.
- Server - Contains server-side only content and logic.
- Client - Contains client-side content and logic.
- Chat - Contains objects that enable chat features.
Up to this point in the tutorial, you have only interacted with objects in the Workspace service of your data model. However, in order for the catapult to operate properly, you must move some of its child script objects to different container services. Roblox offers two types of script objects to contain Luau code that modify object behavior and implement the overall logic of your experience:
- Scripts - A script that can run on the server or client depending on its set RunContext property.
- ModuleScripts - A reusable script that you can require from both server and client scripts.
A Script object's RunContext property determines whether the script runs on the client or server. There are three types of run context:
- Legacy - The script runs based on its parent container. Legacy is the default run context.
- Server - The script runs only on the server, regardless of its parent container.
- Client - The script runs only on the client, regardless of its parent container.
It's important to be mindful of where scripts run, otherwise your objects might not behave the way you want them to. For example, if you playtest the experience right now, players cannot equip projectiles to the catapult or launch them at the targets. To ensure that the gameplay works properly, you must move the children within the ReplicatedStorage and ServerScriptService folders into their respective container services.
ReplicatedStorage contains objects that are available to both the server and connected clients, making it the best location for the experience's gameplay logic that needs to keep track of how many projectiles a player launches before it displays UI. ServerScriptService contains scripting-related assets that are only meant for server use, making it the best location for the experience's gameplay logic that connects projectiles to the catapult, launches projectiles in a particular direction, and resets the catapult to its starting position.
To organize folders into their correct container services for the catapult to work properly:
In the Explorer window, expand the ReplicatedStorage and ServerScriptStorage folders.

Select all children within the ReplicatedStorage folder, then drag them into the ReplicatedStorage service.

Select all children within the ServerScriptStorage folder, then drag them into the ServerScriptStorage service.

Delete the ReplicatedStorage and ServerScriptStorage folders.
- Select both folders.
- Press Delete.
Playtest to verify that the catapult now works properly.
In the menu bar, click the Play button. Studio enters playtest mode.

Equip the Ice projectile to the catapult, aim it toward the nearest floating platform, then launch it at the targets.
Equip the WoodPlanks projectile to the catapult, aim it toward the farthest floating platform, then launch it at the targets.
When you're done playtesting, navigate back to the menu bar and click the Stop button. Studio exits playtest mode.


Customize Projectiles
While your projectiles are exactly the same size as each other, they travel different distances when you launch them from the catapult. This is because each projectile has a unique material that emulates the physical characteristics of its real-world counterpart, including its density, elasticity, and friction.
According to Newton's second law of motion, the acceleration of an object depends on the force acting on the object and the mass of the object itself. As the catapult provides the same amount of force for each launch, each projectile's acceleration changes in proportion to their mass. Projectiles with a small amount of mass accelerate faster than projectiles with a large amount of mass, and projectiles with a large amount of mass accelerate slower than projectiles with a small amount of mass.
To see this principle in action, examine the results from your previous playtest. The WoodPlanks material is less dense than the Ice material, so the wooden projectile is able to accelerate more quickly, and therefore travel a larger distance than the icy projectile from the same launch point. If you were to launch the wooden projectile at the targets closest to the catapult, the projectile would travel above and beyond the platform entirely. Similarly, if you were to launch the icy projectile at the targets furthest from the catapult, the projectile would never be able to travel the distance and make impact with the targets.
Roblox Studio is a real-world simulation engine that emulates physical behavior in real time, so it's important to consider how your objects behave differently depending on their physical characteristics. For the final gameplay section of the tutorial, you will experiment with customizing the third projectile with a material that can reach a third floating platform of targets. To reference a list of physical properties for each material, see Materials - Default Physical Properties.
To customize the third projectile:
Create a third floating platform of targets.
- In the Explorer window, select a TargetPlatform object.
- Press CMD + D to duplicate the platform and targets.
- Use the Move tool to move the new platform to a new position.

Change the third projectile's material to have the right amount of mass to travel to your third platform's targets.
- In the Explorer window, expand the ProjectileMaterials folder, then select ProjectileC.
- In the Properties window, set Material to the real-world material you want the part to simulate, including its visual and physical characteristics. This material needs the right amount of mass to reach the new platform.

Playtest the experience to verify that the projectile makes impact with the targets on the third floating platform.


Publish Experience
Roblox not only provides the tooling and engine for you to create and run experiences, it also gives you access to a large social network of players that access the platform on a wide array of devices, including phones, computers, tablets, consoles, and VR hardware. When you're ready to release your experience to this global audience, you must publish and configure the experience's settings so that it's available to all players on any device you want to support.

Almost everything in Roblox is represented as a cloud-based asset with a unique corresponding ID. This ID is typically in the form of rbxassetid://[ID], which gets applied to various objects as a property that's appropriate for that particular asset type. When you publish an experience, the experience itself receives a UniverseID, and each of its individual places receives a PlaceID.
Once this occurs, the Creator Dashboard provides you tools and resources to monitor, manage, and perform tasks for your experience and its places, such as:
- Monitoring player activity, retention, and growth with analytics features.
- Automatically translating in-experience content for a global audience that speaks a variety of languages with localization features.
- Configuring in-experience purchases and immersive advertising with monetization features.
What you learn on the Creator Dashboard can give you important insights into how to further iterate on your project and engage your audience. For example, if you learn that your audience values multiplayer competition, you could create multiple catapults that keep track of how many targets each player knocks over, then republish the experience to make your update instantaneously available on the platform with only one click.
To publish your experience for the first time:
Upload your experience to the cloud.
In the menu bar, click File, then select Publish to Roblox. The Publish Game window displays.

In the Publish Game window, fill out all applicable fields.
- In the Name field, provide a name for your experience.
- In the Description field, provide a summary of what a player can expect from the experience.
- From the Genre dropdown menu, select the genre that you want to represent your experience.
- In the Devices section, enable every device you want players to use to access your experience.
At the bottom-right of the window, click the Create button. Your experience is now in the cloud with a UniverseID and a PlaceID for the starting place.
Make the experience public to all players.
Navigate to the Creator Dashboard. The Creations landing page displays your first experience.

Hover over the experience's tile, click the ⋯ button, and select Make Public from the contextual menu.

(Optional) Share your experience with others.
From the Creator Dashboard, hover over your experience's tile, click the ⋯ button, and select Copy URL from the contextual menu.

Share the URL with others as a direct link to your experience's landing page.


